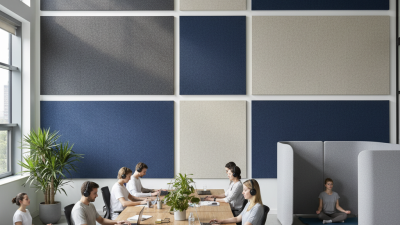
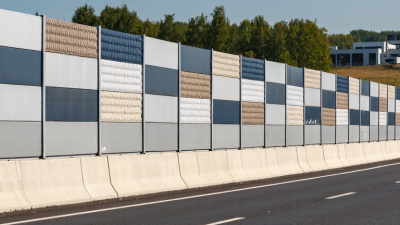
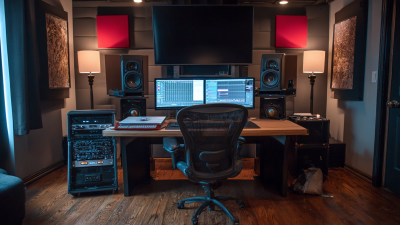
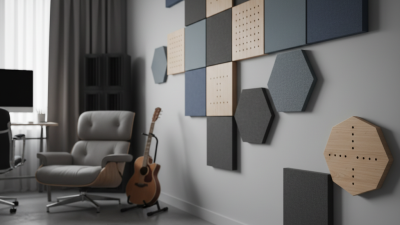
Choosing wall treatment is not simply a matter of selecting attractive fabric and foam. Acoustic performance depends on room size, surface area, ceiling height, furniture, and the sound problem you want to control. A panel that reduces echo in a podcast room may perform poorly beside a noisy meeting area. The right decision begins with measurement.
Industry guidance supports this practical approach. The World Health Organization’s Environmental Noise Guidelines for the European Region links excessive noise exposure with sleep disturbance, stress, and reduced well-being. Although the report focuses mainly on environmental noise, it reinforces an important principle: sound quality affects how people use a space. The U.S. General Services Administration’s Sound Matters research also identifies acoustics as a persistent concern in open-plan workplaces. People often notice poor sound before they understand its cause.
This guide explains how to evaluate Acoustic Panels Walls through absorption ratings, material safety, fire performance, installation methods, and visual durability. It also considers recognized references, including ASTM test methods, ISO 354 sound absorption measurements, and ANSI/ASA S12.60 classroom acoustics criteria. Look for tested performance, not vague claims such as “maximum noise reduction.” That wording can mislead.
Small details matter. A 1-inch panel may not control low-frequency noise effectively. An uncovered wall can still create sharp reflections. A thick, well-positioned panel usually performs better than several decorative tiles placed randomly.
The market offers many convincing designs. Some are excellent. Some are not. Your room deserves evidence, careful placement, and realistic expectations.
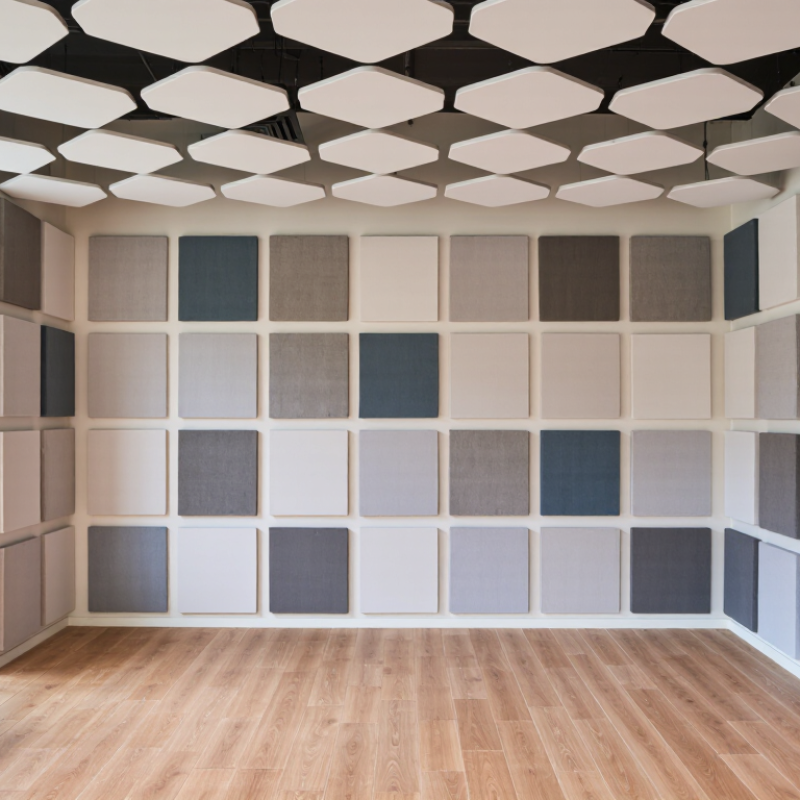
Before buying acoustic panels, define the problem you want to solve. Do you hear harsh echoes, unclear speech, or excessive room noise? These goals require different treatment. A podcast room may need controlled reflections around the microphone. A home office may need less reverberation during video calls. Do not assume thicker panels will fix every sound problem.
Walk through the room and listen carefully. Clap near the center, then speak from the usual listening position. Notice ringing reflections from bare walls, glass, and hard flooring. Measure the room’s length, width, and ceiling height. Also record furniture, windows, doors, and existing soft materials. A simple sketch can reveal untreated surfaces that photographs hide.
I once estimated panel coverage by wall area alone, and the result was disappointing. The room became quieter, but speech still sounded uneven. My mistake was ignoring the ceiling and the reflection path between the desk and wall. Use panels at early reflection points, not only where they look attractive. Leave enough space for doors, lighting, and ventilation. Check the panel’s tested absorption data, such as its noise reduction rating, but treat ratings as guidance rather than a guarantee. Room shape, installation gaps, and panel spacing can change performance. Start with a small, movable group if your budget is limited. Listen again after each change. That practical test may challenge your original plan.
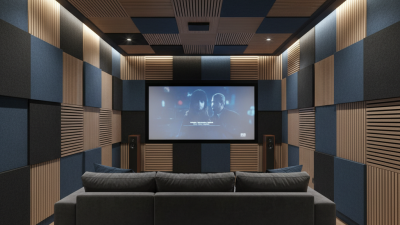
Panel material strongly affects what you hear and feel in a room. Fiberglass and mineral wool panels usually absorb mid and high frequencies effectively. They can also perform better with lower frequencies when they are thicker and spaced from the wall. Fabric coverings should be acoustically transparent, not tightly sealed. Foam panels are lightweight and easy to install, but thin foam often leaves bass problems untouched. I learned this after treating a small office that still sounded boomy.
Shape changes more than appearance. Flat panels work well on walls and reduce reflections near desks or speakers. Beveled edges can soften visual bulk without greatly changing performance. Hanging clouds and vertical baffles expose more surface area, helping in rooms with high ceilings. Irregular layouts may look interesting, but random placement does not guarantee balanced absorption. Measure the room before buying.
Check the Noise Reduction Coefficient, or NRC, but do not treat it as a complete answer. NRC averages absorption around selected midrange frequencies. It may not show how a panel handles deep bass or sharp treble. Ask for test data across several frequencies when available. A 50-millimeter panel with an air gap may outperform a thicker panel mounted tightly. Small details matter. Room size, furniture, panel spacing, and listening position all influence results. My own mistake was treating a rating as a promise instead of one piece of evidence.
When buying acoustic panels for walls, measure the room before choosing a design. Tip one: measure each wall, including doors and windows. Tip two: mark the reflection points beside your speakers or main listening seat. Tip three: choose larger panels for wide reflections. Small panels may leave noticeable gaps. Tip four: compare the panel’s actual coverage area, not its package count. Six narrow panels may cover less wall than four broad ones. I once underestimated this difference.
Tip five: select thickness according to the sound problem. Panels around two inches thick can reduce many mid and high frequencies. Thicker panels usually absorb lower frequencies more effectively. Tip six: leave a small air gap behind the panel when possible. This can improve absorption, especially at lower ranges. Tip seven: avoid covering every wall equally. A balanced mix of treated and untreated surfaces often sounds more natural. Too much absorption can make speech feel strangely dry.
Tip eight: use thicker panels in corners or near strong bass buildup, but do not expect them to solve every bass issue. Tip nine: check the material’s density, mounting method, and tested absorption data. Product photos cannot confirm performance. Tip ten: plan coverage around real use, such as conversation, recording, or home cinema. Measure twice. Buy once, ideally. My earlier mistake was treating thickness as the only important feature. Room layout, panel spacing, and total coverage matter just as much.
| Tip | What to Evaluate | Practical Guidance | Useful Calculation or Example | Buying Action |
|---|---|---|---|---|
| 1. Measure the wall area | Available wall width and height, excluding doors and windows. | Measure each wall separately and record the dimensions in the same unit. | Wall area = width × height. A 4 m × 2.5 m wall has 10 m² of surface area. | Create a simple wall plan before choosing panel quantities. |
| 2. Select a practical panel size | Panel dimensions, handling space, and the visual layout of the room. | Common rectangular formats include approximately 600 × 600 mm, 600 × 1200 mm, and 1200 × 2400 mm. | A 600 × 1200 mm panel covers 0.72 m² before allowing for spacing. | Use smaller panels for flexible patterns and larger panels for faster installation. |
| 3. Match thickness to the sound problem | The frequency range you want to control. | Panels around 25–50 mm thick are commonly used for mid- and high-frequency reflection control. Thicker panels generally improve low-frequency absorption when properly installed. | A 50 mm panel typically offers more low-frequency absorption potential than a 25 mm panel made from the same type of porous material. | Choose thickness based on the room’s acoustic issue, not appearance alone. |
| 4. Consider an air gap behind the panel | Distance between the panel and the wall. | An air gap can improve absorption at lower frequencies by allowing sound energy to interact with the rear surface of the panel. | A 50 mm panel installed with a 50 mm air gap has an approximate 100 mm total acoustic depth. | Use spacers or a frame when wall depth is available. |
| 5. Calculate the required coverage area | Percentage of wall or room surface that should be treated. | For general reflection control, a starting target of approximately 15–30% of the total wall area is often practical, followed by listening tests. | For a 20 m² wall, 20% coverage equals 4 m² of panels. | Buy enough panels for the target coverage plus a small allowance for layout and cutting. |
| 6. Check the absorption rating | Published acoustic test results, such as NRC or frequency-specific absorption coefficients. | NRC is a rounded average based mainly on measurements at 250, 500, 1000, and 2000 Hz; it does not fully describe low-frequency performance. | An NRC value near 0.80 indicates strong average absorption in the tested mid/high-frequency range, not complete sound blocking. | Request standardized test data and review the full frequency range when available. |
| 7. Position panels at reflection points | Early reflections from side walls, the ceiling, and the wall behind speakers or performers. | Treating first-reflection areas can improve speech intelligibility and stereo clarity more efficiently than covering random wall sections. | Use a mirror-positioning method: mark locations where the sound source is visible from the listening position through a wall mirror. | Prioritize acoustically important locations before adding decorative coverage. |
| 8. Leave controlled spacing between panels | Panel arrangement, wall exposure, and the desired balance between absorption and reflection. | A small gap between panels can create a balanced appearance and preserve some natural room liveliness. | For 600 mm-wide panels, a 50–100 mm visual gap is commonly easy to lay out and maintain. | Include spacing in the wall plan so the final coverage is not overestimated. |
| 9. Verify safety and installation requirements | Fire performance, mounting method, panel weight, and wall condition. | Fabric, foam, and fiber-based products can have different fire classifications and fixing requirements. Heavy panels may need mechanical anchors. | For rented spaces, removable mounting systems may be preferable; for heavy framed panels, use fasteners rated for the wall type. | Request fire-test documentation and installation instructions before purchase. |
| 10. Avoid treating soundproofing as absorption | Whether the goal is reducing echo inside the room or blocking sound transmission through walls. | Wall panels primarily reduce reflections and reverberation inside a room; they do not usually provide significant sound isolation between rooms. | For sound isolation, wall construction, sealing, mass, decoupling, and doors are usually more important than surface panels. | Choose acoustic panels for room sound quality and use a building-based isolation solution for noise transmission. |
Buying acoustic panels is less about appearance than controlled installation. Tip 1: Check the Noise Reduction Coefficient, or NRC. ASTM C423 calculates it from absorption at 250, 500, 1,000, and 2,000 Hz. The result is rounded to 0.05, so it is not a complete frequency profile. Tip 2: Request the full test report. Tip 3: Compare panels tested under ASTM C423 or ISO 354. A high NRC does not block sound through a wall.
Tip 4: Inspect the wall before drilling. Drywall, masonry, and wood require different anchors. Tip 5: Confirm the panel weight and fixing capacity. Tip 6: Use removable clips in rented spaces, but verify their load rating. Adhesive can fail on dusty or painted surfaces. Tip 7: Leave an air gap when possible. Laboratory testing and guidance in the 2023 ASHRAE Handbook indicate that spacing can improve low-frequency absorption. Small details matter.
Tip 8: Place panels at first-reflection points beside the listener. Tip 9: Add ceiling treatment when voices remain harsh. Tip 10: Keep vents, sprinklers, doors, and electrical access clear. The U.S. General Services Administration’s acoustical guidance prioritizes balanced absorption, not simply covering every wall. I once preferred a symmetrical layout, but it created a visually neat and acoustically uneven room. Real rooms need measurement. Walk, speak, and listen from several positions before final fixing.
When buying acoustic panels for walls, check safety before style. Ask for tested fire-performance data and low-emission material information. Confirm that the panel suits your room’s moisture and temperature conditions. Secure installation matters, especially above desks, beds, or busy walkways. Measure twice. A loose edge can become a practical hazard.
Next, study appearance in the actual room light. Screen colors can mislead. Compare fabric texture, panel thickness, and joint lines beside your walls. Choose a layout that supports speech clarity without making the room feel crowded. Consider dust, fingerprints, and cleaning access. Attractive surfaces still need maintenance. I once underestimated how strongly dark panels changed a small office.
Durability should match daily use. Inspect edge finishing, surface resistance, and mounting hardware. Ask whether panels can be cleaned, moved, or replaced individually. A longer warranty may help, but read its conditions carefully. Calculate the overall cost, not only the panel price. Include trims, adhesives, brackets, delivery, installation, and future repairs. Cheap panels may require more coverage or perform poorly in key areas. Expensive panels are not automatically better. Compare tested acoustic results, material quality, expected service life, and total installed cost. Leave room for uncertainty; real rooms rarely behave like product charts.