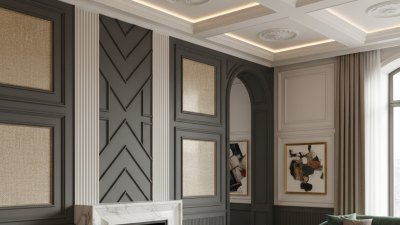
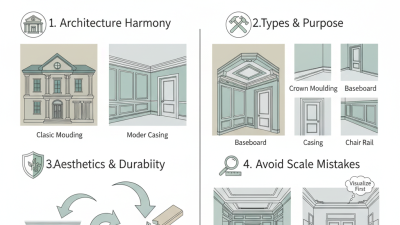
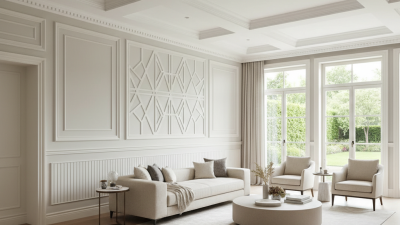
Buying Decorative Moulding can transform a plain room, but the wrong profile may make the space feel crowded or strangely unfinished. This guide, “10 Tips for Buying Decorative Moulding,” looks beyond color and price. It considers ceiling height, wall length, room purpose, material strength, installation needs, and the small details that affect the final result.
John Canning, a respected decorative arts conservator and founder of John Canning & Co., has often emphasized the importance of preserving visual character: “The goal of restoration is not to make something look new, but to make it look like it has always been there.” That principle also applies to new moulding. A Victorian profile may look beautiful in a catalog, yet feel excessive in a clean-lined apartment. A narrow trim can disappear on a tall wall. Measure twice.
The tips ahead will help you compare wood, polyurethane, plaster, and composite options with greater confidence. You will also examine corners, shadows, paint finishes, joint visibility, and long-term maintenance. A sample beside your wall can reveal more than a product photograph. Small mistakes matter. Even experienced renovators sometimes choose a profile that looks impressive alone but loses balance across the room. Use these suggestions as a practical starting point, not an absolute formula. Your home’s proportions, lighting, and character should make the final decision.
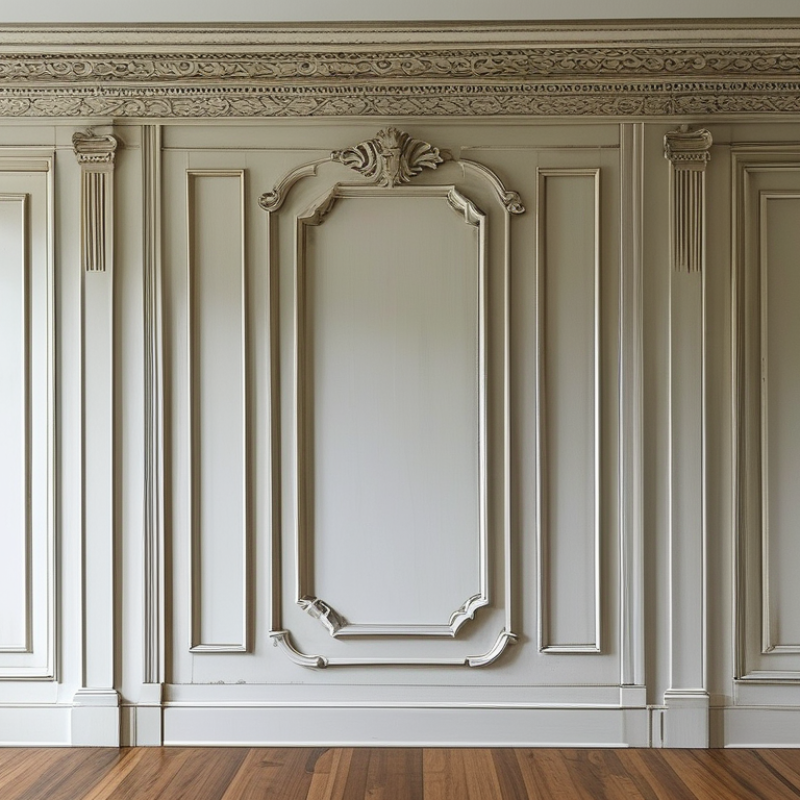
Decorative moulding can change a room’s proportions, not merely cover a joint. Crown moulding softens the ceiling line, while baseboards protect walls from shoes, vacuums, and furniture. Chair rails can divide a wall visually, but they should match the room’s scale. Measure the wall height first. A wide profile may overwhelm a low ceiling.
Choose casing around doors and windows for structure and emphasis. Picture-frame moulding adds rhythm to plain walls. Wainscoting gives hallways and dining rooms a durable lower section. Flexible moulding works around curves, while wood suits areas needing crisp detail. Polymer and composite profiles often resist moisture better than untreated wood. Check the material, not just the surface finish.
Look closely at corners and lighting. Sharp profiles create stronger shadows. Rounded edges feel quieter. Use a sample beside your flooring and wall color before ordering. Keep extra length for waste and imperfect cuts. Measure twice. I once trusted a “standard” doorway measurement and had to remake two pieces. That mistake still guides my planning. Consider installation skill, adhesive compatibility, nail placement, and future painting. Match the moulding’s thickness across connected rooms when possible. A small transition block can hide awkward joins, but it should look intentional. Avoid excessive layers; decorative detail needs breathing space. A room can be elegant with less trim.
Decorative moulding sizes vary by room proportions and design style. These representative nominal widths show how different moulding types are commonly selected: crown moulding frames the ceiling, baseboard protects and finishes the wall base, casing surrounds doors and windows, while chair rails, picture rails, and panel moulding add architectural detail.
Decorative moulding should support your room, not compete with it. Study the existing doors, flooring, furniture, and ceiling lines before choosing a profile. A narrow room usually benefits from slimmer trim, while tall ceilings can handle deeper details. Measure twice. Record wall lengths, corner angles, and ceiling height carefully. Small errors can create visible gaps during installation.
Lighting changes everything. View moulding samples in daylight, evening light, and under your usual lamps. Smooth profiles often suit modern interiors, while layered edges can complement traditional spaces. However, style labels are only guides. I once selected an ornate design for a quiet bedroom, and the result felt heavier than expected. A simpler profile would have worked better.
Consider practical conditions as well as appearance. In humid areas, choose a stable material and confirm its moisture resistance. Check whether the wall is uneven, since flexible moulding may fit better than rigid sections. Plan around sockets, radiators, curtains, and furniture before cutting anything. Leave room for error. Buying extra length helps with damaged corners and inaccurate cuts. If you are unsure, create a small test section first. It may look unnecessary, but it reveals proportion, shadow lines, and colour problems before the full installation.
Buying decorative moulding starts with the material, not the showroom finish. Wood offers natural grain and can be sanded, repaired, and repainted. It may also expand in humid rooms. Medium-density fibreboard creates sharp profiles and consistent lengths, but damaged edges are difficult to repair. Polyurethane is lightweight and moisture-resistant, although some low-density products dent easily. Test a sample with your fingernail.
Tip 1: Match the material to the room. Use moisture-resistant options near bathrooms, kitchens, and exterior doors. In dry living spaces, wood can provide warmer visual detail. I once selected a deep profile for a narrow hallway. It looked impressive in the store, but crowded the wall at home. Scale matters more than drama.
Tip 2: Compare profiles beside your existing trim. Measure the ceiling height, door casing, and shadow lines before ordering. A simple ogee profile suits traditional interiors, while square edges support a cleaner appearance. Inspect every length under bright light. Look for straight edges, even coating, tight joints, and consistent density. Quality problems often appear at corners first. Tip 3: Ask how the moulding handles impact, heat, and moisture. Check installation guidance and recommended adhesives. Durable trim still needs careful cutting and secure fixing. I have learned that rushing the first corner creates visible errors throughout the room. Leave extra material for mistakes, because perfect cuts are not guaranteed.
| No. | Buying Tip | Material to Consider | Profile and Appearance | Quality Checks | Durability and Maintenance | Typical Best Use |
|---|---|---|---|---|---|---|
| 1 | Match the material to the room conditions | Solid wood, medium-density fiberboard, polymer, or plaster | Choose a style that suits the room scale and existing trim | Check for consistent density, clean edges, and a smooth surface | Moisture and temperature changes affect materials differently; confirm suitability before installation | Wood for traditional interiors; polymer for humid areas; plaster for ornate interiors |
| 2 | Compare solid wood with engineered wood | Solid wood versus medium-density fiberboard | Both can provide simple, stepped, or decorative profiles | Solid wood should be straight and properly kiln-dried; fiberboard should have uniform edges without swelling | Solid wood can be repaired and refinished; fiberboard requires careful sealing against moisture | Interior walls, doors, window surrounds, and painted trim |
| 3 | Consider polymer for moisture-prone locations | High-density polyurethane or other moisture-resistant polymer | Available in lightweight decorative shapes with crisp detailing | Look for sharp corners, consistent dimensions, and a stable surface coating | Resists moisture and insects better than many wood products; protect from severe impact | Bathrooms, kitchens, laundry areas, and covered exterior applications when rated for them |
| 4 | Select the profile according to ceiling height | Any suitable moulding material | Use narrower profiles in low rooms and larger profiles in tall rooms to maintain visual balance | Review full-size samples when possible because small samples can make profiles appear less substantial | Profile size does not determine durability; installation and material stability are more important | Crown moulding, cornices, baseboards, and picture rails |
| 5 | Inspect surface preparation before painting | Primed wood, primed fiberboard, polymer, or plaster | A smooth finish highlights both simple and highly detailed profiles | Check for even primer coverage, minimal pinholes, no raised fibers, and no visible dents | A suitable primer and finish coat improve stain resistance and reduce moisture absorption | Projects requiring a seamless painted finish |
| 6 | Check dimensional stability | Engineered wood, polymer, or stable kiln-dried wood | Straight profiles create cleaner joints and more consistent shadow lines | Lay long pieces on a flat surface and check for bowing, twisting, or uneven thickness | Stable materials reduce open joints caused by seasonal expansion and contraction | Long walls, continuous ceiling lines, and detailed installations |
| 7 | Evaluate impact resistance in busy areas | Hardwood, high-density polymer, or impact-resistant composite | Choose simpler profiles where frequent contact could damage fragile details | Press lightly on samples and inspect edges for crushing or cracking; avoid overly brittle pieces | Harder surfaces generally withstand knocks better, but all materials can be damaged by heavy impact | Hallways, stairways, family rooms, and commercial interiors |
| 8 | Compare jointing and installation requirements | Wood, fiberboard, polymer, or plaster | Intricate profiles usually require more precise miters and careful alignment | Confirm that accessories, joining methods, and recommended adhesives are compatible with the material | Correct fastening and filled joints help prevent movement, cracking, and visible gaps | DIY installations and professional trim work |
| 9 | Check fire and location requirements | Wood, polymer, plaster, or mineral-based products depending on the application | Decorative appearance should not override building and installation requirements | Review the product technical sheet for fire classification, indoor-use limits, and required clearances | Performance depends on the product formulation, substrate, temperature, and installation method | Residential, hospitality, office, and public spaces subject to local regulations |
| 10 | Balance appearance, lifespan, and total cost | Compare material price, accessories, labor, finishing, and future maintenance | Choose a profile that supports the design without making repairs or replacements unnecessarily difficult | Compare samples, dimensions, warranty terms, installation guidance, and consistency across pieces | The most economical option is usually the one that suits the environment and needs fewer repairs | Any project where long-term value matters |
Note: Actual performance varies by product formulation, manufacturing quality, installation method, environmental exposure, and local building requirements. Always review the technical documentation for the specific moulding selected.
Accurate measurements make decorative moulding easier to install and reduce costly waste. Measure every wall separately, even when the room appears symmetrical. Walls often vary slightly because of plaster, flooring, or older construction.
Record each wall’s length in millimetres, then measure doors, windows, and other openings. Subtract those openings only when the moulding will not run across them. For a rectangular room, add the usable wall lengths to find the total linear requirement. A simple sketch helps prevent missed sections. Measure twice.
Convert the total length into the number of moulding pieces available. Divide the required length by each piece’s length, then round up to a whole piece. Add 10 to 15 percent for mitred corners, joining cuts, damage, and measurement errors. Long walls vary. For example, 18 metres of usable wall space may require 20.7 metres after adding a 15 percent allowance. That equals seven 3-metre pieces, not six.
Corner angles deserve careful attention. Internal corners may need longer cuts than expected, while external corners can consume extra material. I once measured only the floor perimeter and overlooked a recessed doorway. That mistake caused an unnecessary second purchase. Now I check the ceiling line, wall breaks, and fitting direction before calculating quantities. Keep the measurement sheet near the installation area, and mark each completed wall. Small details matter.
Decorative moulding costs depend on material, profile depth, corners, and waste. A simple pine casing may cost less, but intricate hardwood profiles require careful matching. The 2024 Cost vs. Value Report by Zonda shows that interior remodeling remains labor-intensive, so installation can exceed material costs. Request a room-by-room quote. Include adhesive, fasteners, primer, paint, delivery, and at least 10% cutting waste.
Finish selection affects both appearance and maintenance. Factory-primed moulding usually reduces preparation time, while painted wood allows easier color changes. Moisture-prone rooms need stable materials and sealed joints. The U.S. Environmental Protection Agency recommends indoor humidity between 30% and 50%, which helps limit swelling, shrinkage, and surface problems. Glossy finishes reveal dents quickly. Matte finishes hide minor flaws better. Small samples matter.
Installation methods should match the wall and profile weight. Lightweight moulding may use adhesive and brad nails; heavier pieces need firm anchoring into studs or suitable wall plugs. Leave expansion space where materials meet floors or doors. Poorly filled nail holes remain visible under strong lighting. That detail is often missed. Maintenance is simple, but not effortless: dust ledges with a soft brush, wipe painted surfaces with a damp cloth, and inspect joints twice yearly. The Harvard Joint Center for Housing Studies continues to identify repair and replacement as major parts of homeowner improvement spending, reinforcing the value of accessible, durable finishes.